As promised I have made mozzarella from the delicious jersey milk I got from Queen acres farm. You can also make cheese at home even if you don't have a local dairy source. All you need is a gallon of whole milk from the grocery store and a kit like what I bought on line. If you have a local cheesemaking shop and can get citric acid (usually sold at health stores) and rennet, you don't need the kit, but the New England Cheesemaking Supply company is so handy and everything you need comes right in the kits. Here is a link to the kits I bought:
http://www.cheesemaking.com/store/p/314-Ricki-s-Cheese-Making-Duo-K1-K2-.html
These kits will do both soft and hard cheeses and since I love to experiment with food I got both kits.
If you only want to make mozzarella you can just buy this kit:
http://www.cheesemaking.com/30-Minute-Mozzarella-Ricotta-Kit.html
This was a really fast recipe. When they say 30 minute mozzarella they are pretty close, I took maybe 40-45 minutes. BUT it is 30 minutes of hands on time, so keep that in mind. I followed their directions to the letter and this came out really nice. I probably over stretched the mozzarella (we'll get to that), but it still came out very nice. So here we go!
Homemade Mozzarella

 |
| Here is the kit! |
Ingredients:
1 gallon of milk (NOT ultra-pasteurized)
1 1/4c cool water (Distilled, or spring, MUST be chlorine free, so NO tap water)
1 1/2 tsp. citric acid
1/4 rennet tablet (1/4 tsp if using liquid rennet)
1 tsp. cheese salt (or you can use Herbs de Provence or other herbs)
Put about 6 c. of water into a bowl and stick it in the fridge, you'll thank me later...
Cut rennet tablet into quarters and dissolve in 1/4 c. cool water
 |
| Rennet tablet. I cut it with a knife, using a pill cutter would have been a better idea |
 |
| dissolved in 1/4 c. water |


 |
| 1 gallon of Jersey Milk from Queen Acres Farm |
 |
| Look at that cream plug! This would have made excellent ice cream |
 |
| After stirring vigorously I jimmy rigged my meat thermometer to the pot to monitor heat |
Heat the milk to 90F while stirring

 |
| 55F, yep this is where the milk started. BUT it only took ~5-7 minutes to get up to 90F. Just be sure to stir vigorously so the milk doesn't scald or burn on the bottom! |
Remove the pot from the burner and slowly stir in rennet solution with an up and down motion for aprox. 30 seconds
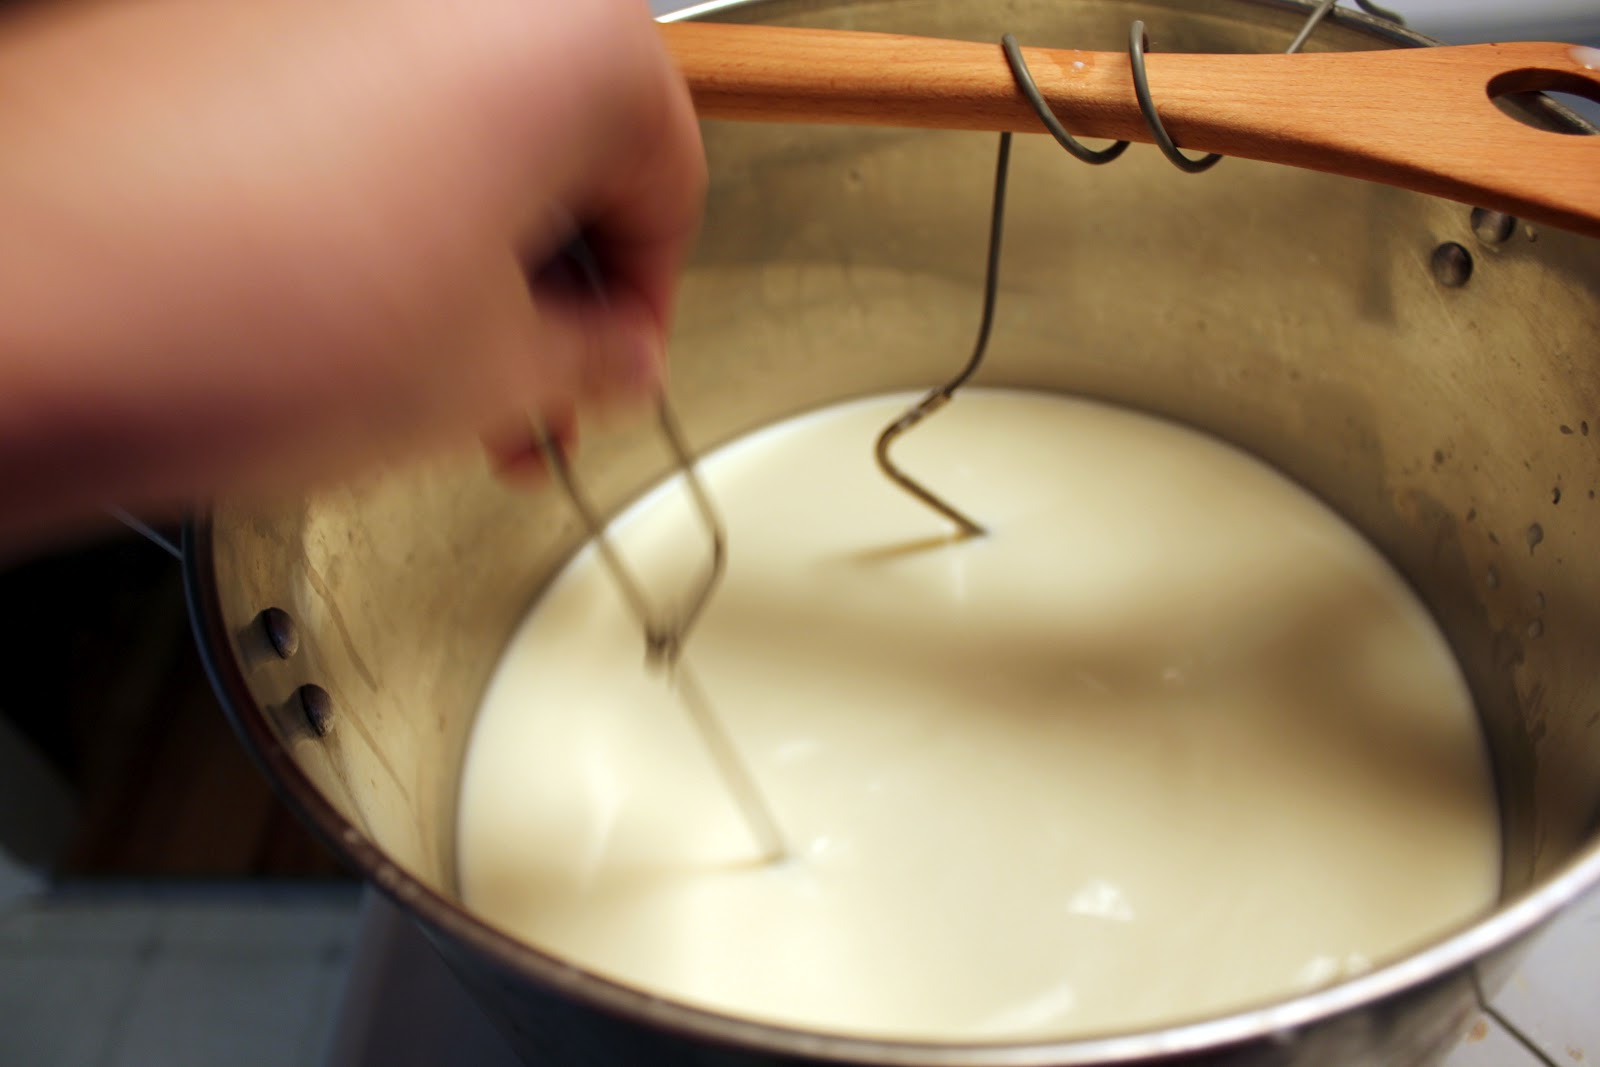 |
| 30 seconds of up and down mixing |
Cover the pot and leave undisturbed for 5 minutes. Check the curd after 5 minutes. It should look like custard, with a clear separation between the curd and the whey. If the curd is too soft or the whey milky, let set for a few more minutes. If you didn't get a curd at all, you may have used ultra-pasteurized milk and are now SOL.
 |
| Ewww! Not ready yet! The whey is still milky looking. 5 more minutes covered... |
Since mine was not quite ready, I let it sit another 5 minutes and checked again
 |
| Much better! See how instead of it cracking it pushed down AND you can see the clear whey. We're ready to cut curd! |
Cut the curd with a knife that reached the bottom of your pot
 |
| This is what the instructions look like to tell you how to do it |
 |
| Starting to cut |
 |
| Cutting curd |
 |
| You can see a bit better the slicing of the curd |
 |
| Now you can see all the curds cut up |
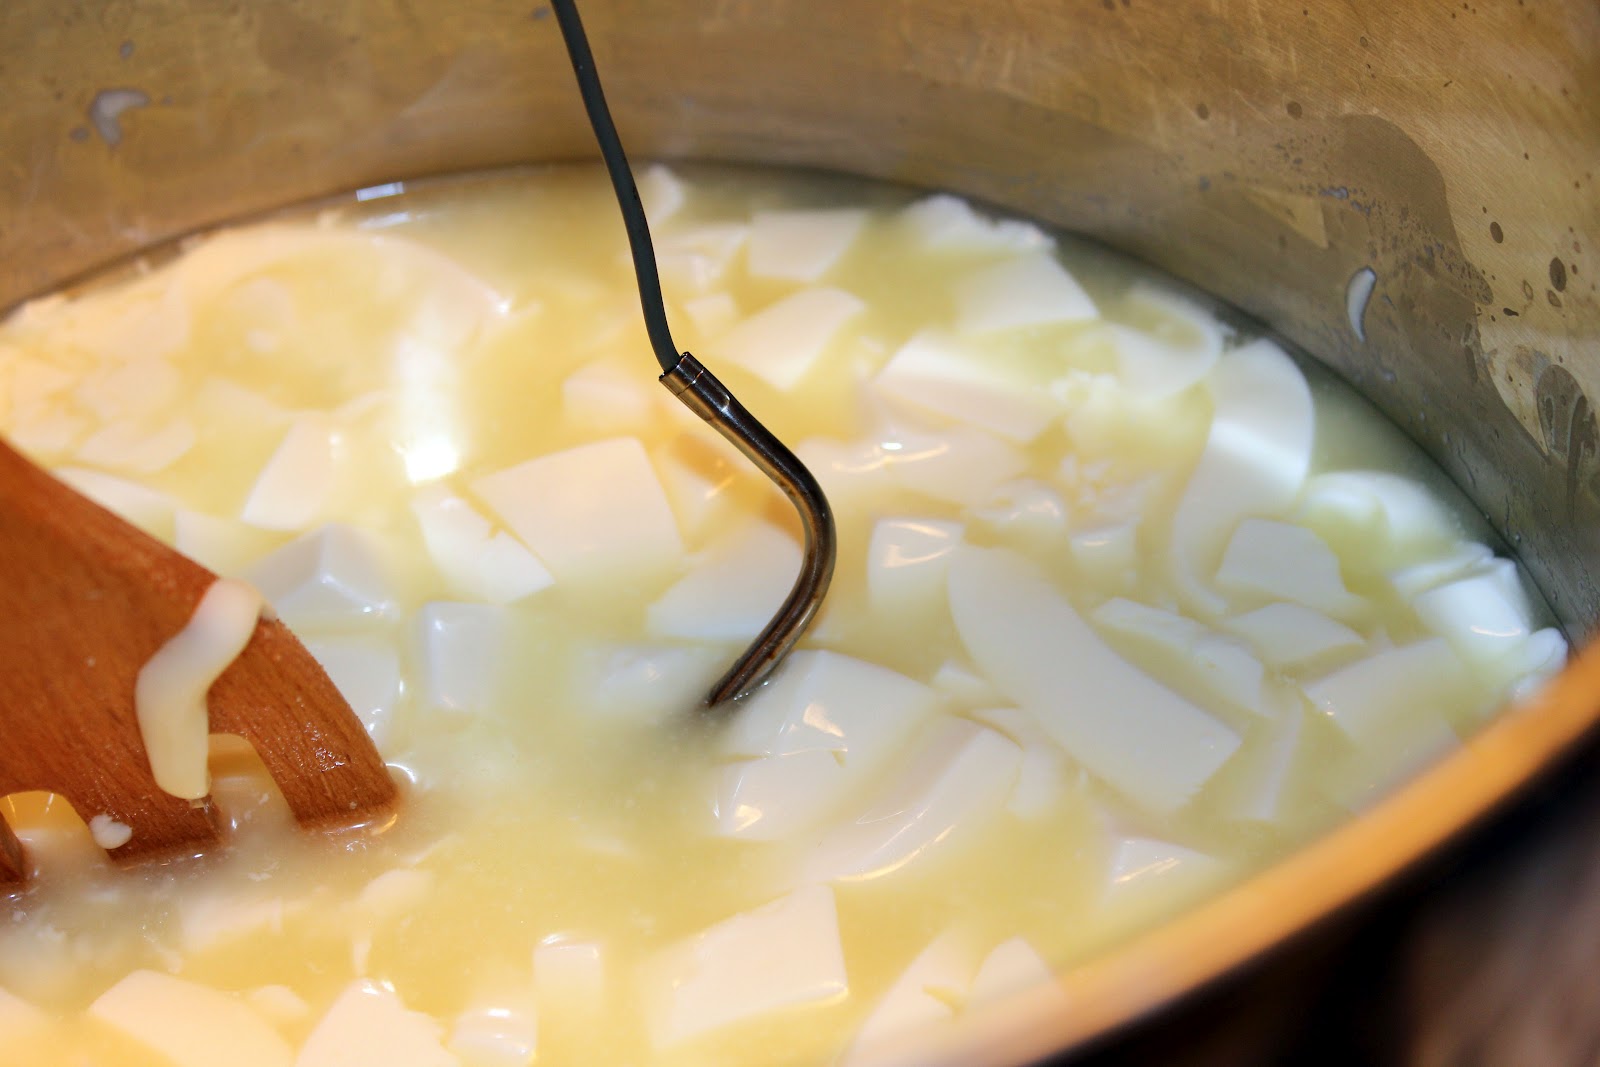 |
| The curd with the temperature probe in it. Kind of looks like hot and sour soup at this point |
 |
| Looks like egg drop soup now |
Pour off floating whey (I used a sifter to catch wayward curds) I dud this until there was no whey left adding curds to a large microwave bowl as soon as you get a few in the sifter. DO NOT PRESS ON THE CURDS TO GET THE WHEY OUT.
 |
| As I got a few curds in the sieve, I tossed it into the bowl so that it didn't get too smushed. |
 |
| I kept half of the whey because the recipe book has some nice recipes for bread & Pizza dough using whey |
After you have drained as much whey out of the curds as you can without pressing on them, place the bowl in the microwave for 1 minute

Remove and drain off the whey as you gently fold the curds into 1 piece. It is HOT do not burn yourself, but you need to do it while its hot. At this time you can add the salt or herbs. I used salt for this batch, I'm thinking of using Italian herbs for the next batch :-)

 |
| This is actually from the original 1 minute but I thought the picture fit better here |
Stretch the cheese by pulling like taffy until smooth and shiny. The more you work the cheese, the firmer it will be, but don't work it too much or it will become grainy! Its a fine line, but SOOO fun to play with. This step is also hot so don't burn yourself!
 |
| Stretch |
 |
| Streeeetttccchhhh |
 |
| Its like Stretch Armstrong! Time to stop taking pictures and use 2 hands! |
Form the cheese into a log, ball, or braid it. You can also make it into bite sized morsels. Sadly I could not photograph me braiding the cheese because I seem to be missing a 3rd hand and the sous chef was mowing the lawn. I did manage to drip whey on my camera though, so I guess that's something...
When finished submerge the cheese in 50F water (use the bowl of water you put in the fridge in the beginning. See I told you you'd thank me!) and cool for 5 minutes.


 |
| Clifford says, "Miss Muffett's got nothing on me! This whey is DELICIOUS!" |
"Natural calf rennet is extracted from the inner mucosa of the fourth stomach chamber (the abomasum) of slaughtered young, unweaned calves. These stomachs are a by-product of veal production. If rennet is extracted from older calves (grass-fed or grain-fed) the rennet contains less or no chymosin but a high level of pepsin and can only be used for special types of milk and cheeses."
It sounds yucky, but it is the BEST for cheese making. I was a bit dubious of the veggie rennet because in the past it has not worked well for me, but this one seemed to work great! If you want to do this on the real cheap, you can buy the rennet for $6.50 (10 tabs or 40 batches) and the citric acid for $5.95 and skip the kit, but the kit also comes with cheese cloth and some other items. Its a pretty good deal, and they ship FAST.
This was so fun to make I will definitely make it again probably with a gallon of milk from the store, just make sure its not ultra-pasteurized.
For now, my plans for this cheese are a pizza Margarita, and to serve it over some pasta with fresh tomato sauce. Oh, and of course share with my lab mates so they get to try fresh cheese too!
Happy eating!
Jen - this is great! I would have never believed that I could make my own cheese, but after your pictures & explanation, I'm inspired to try!
ReplyDeleteI'm so happy to hear! That means this blog is doing exactly what I hoped it would. Let me know how it turns out!
Delete